
Installing a dedicated ablution area requires more planning than simply choosing a basin and attaching it to a bathroom wall. The position of water connections, drainage, floor slope, and available clearance all affect how comfortably the washing area works. Poor planning can lead to water leakage, restricted movement, and expensive plumbing adjustments after installation.
A Wudu sink needs an installation arrangement that supports regular washing activities, including hand, face, arm, and foot washing. Its dimensions and plumbing layout should match the bathroom structure and the people who will use it. Reviewing these requirements before construction or renovation helps create a functional ablution area without unnecessary modifications later.
1. Assess The Available Installation Space
The first step is to identify where the basin will fit without affecting movement around the bathroom. A dedicated washing area needs enough room for users to stand comfortably, reach the faucet, and complete their washing routine.
Measure the width and depth of the intended location. Also check the distance between the basin and nearby walls, doors, toilets, cabinets, and shower enclosures.
Consider The Basin Dimensions
The basin dimensions should match the available space and intended use. A compact model may suit a small residential bathroom, whereas a larger installation may work better in a family home or shared prayer facility.
Consider the following measurements:
- Width: Determines how much horizontal space the fixture occupies.
- Depth: Affects washing comfort and the amount of water the basin can contain.
- Height: Influences how easily users can reach the washing surface.
- Front clearance: Provides enough room to stand or sit during ablution.
- Side clearance: Allows users to move without hitting nearby fixtures.
Always check the manufacturer’s actual product dimensions rather than estimating the required space from photographs.
Allow Room For Foot Washing
Foot washing needs additional consideration during installation planning. A conventional basin may not provide enough room for this activity, particularly when users need to bend or raise their feet.
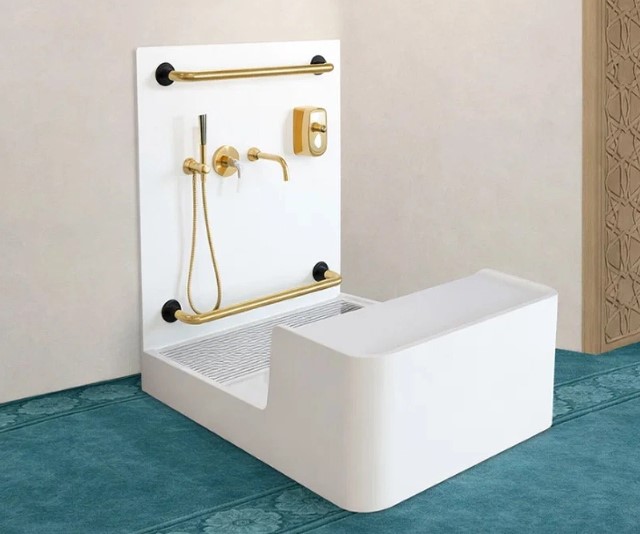
Some specialized models include a lower washing section or a separate foot basin. Check the dimensions of this area and make sure users have enough space to position their feet comfortably.
The surrounding floor should also provide sufficient grip to reduce slipping risks.
2. Plan The Water Supply Connections
A reliable water supply is essential for any ablution installation. The connection points should allow the faucet to deliver water comfortably without creating unnecessary splashing.
Before installing the basin, identify the existing hot and cold water lines. Check their condition and confirm that their positions match the selected fixture.
Choose A Suitable Faucet Position
The faucet should be positioned within easy reach of users. Its height and distance from the basin affect the water stream and the amount of splashing.
A faucet with an appropriate spout reach allows water to flow toward the center of the basin. This helps prevent water from hitting the edges and spilling onto the surrounding countertop.
Wall-mounted faucets may suit certain basin designs, whereas deck-mounted options work with basins that include faucet openings.
Check Water Pressure
Water pressure affects how consistently the faucet supplies water. Very low pressure may make washing inconvenient, whereas excessive pressure can cause splashing.
Ask a qualified plumber to check the existing supply and confirm that it meets the faucet manufacturer’s requirements. Pressure-regulating components may be necessary in some installations.
Include Shut-Off Valves
Accessible shut-off valves make future plumbing repairs easier. They allow the water supply to be isolated without turning off water throughout the property.
Install suitable valves according to local plumbing requirements and keep them accessible for maintenance.
3. Design An Effective Drainage System
Drainage is one of the most important parts of an ablution area. Water from hand, face, arm, and foot washing needs a clear route into the plumbing system.
A poorly positioned drain can leave standing water inside the basin or around the installation. Over time, this may contribute to mineral deposits, unpleasant odors, and slippery surfaces.
Match The Drain Outlet With The Basin
Check the drain opening and outlet position before purchasing the fixture. The basin and plumbing connections need to match to avoid unnecessary pipe adjustments.
Also confirm that the drain assembly is compatible with the basin material and design.
Select A Suitable Drain Size
The drain should handle the expected water flow without frequent blockages. A qualified plumber can recommend an appropriate outlet size based on the basin specifications and local plumbing standards.
A removable drain strainer may also help catch hair and other debris before it enters the plumbing system.
Prevent Standing Water
The basin’s internal shape should direct water toward the drain. Sloped surfaces and correctly positioned outlets help reduce water accumulation.
For separate foot-washing areas, check that the drain can manage the expected flow and that water does not spread across the surrounding floor.
4. Understand Wall-Mounted And Floor-Standing Installation Requirements
The installation method affects the amount of preparation needed before fitting the basin. Wall-mounted and floor-standing models have different structural and plumbing requirements.
Wall-Mounted Basin Installation
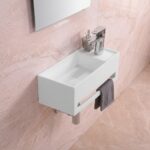
A wall-mounted model attaches to a supporting wall through brackets, bolts, or a manufacturer-approved mounting system.
Before installation, check whether the wall has enough structural strength to support the fixture. Drywall or lightweight partitions may require additional reinforcement.
Important considerations include:
- Suitable wall reinforcement behind the mounting points.
- Correct positioning of mounting brackets.
- Accessible water supply and drainage connections.
- Appropriate installation height.
- Secure sealing around plumbing openings.
Accurate measurements are important because correcting the mounting position after tiling or finishing work can increase labor costs.
Floor-Standing Basin Installation
A floor-standing model rests on the bathroom floor and may include a pedestal or enclosed base.
The floor must be level and strong enough to support the fixture. Installers also need to check the drainage outlet and water supply positions before securing the basin.
Some models conceal plumbing connections within the base. Make sure the design still allows access for repairs and maintenance.
5. Prepare The Bathroom Floor For Water Exposure
An ablution area experiences frequent water use, particularly when the design includes a dedicated foot-washing section. The floor needs suitable protection to prevent moisture from reaching nearby walls or flooring materials.
Install Waterproof Flooring
Choose flooring materials designed for wet bathroom environments. Porcelain tiles and other suitable waterproof finishes are common options.
Pay attention to the joints between tiles because poorly sealed gaps may allow water to reach the underlying structure.
Provide A Suitable Floor Slope
The floor should direct water toward the designated drain rather than allowing it to collect around the basin.
A qualified installer can determine the appropriate slope according to the bathroom layout and local building requirements. The gradient should support drainage without making the floor uncomfortable or difficult to walk on.
Use Slip-Resistant Surfaces
Wet bathroom floors can become dangerous, especially near foot-washing areas. Select tiles with suitable slip-resistance properties for the intended environment.
Avoid highly polished surfaces in areas that regularly become wet.
6. Consider Accessibility And User Comfort
The installation should accommodate the people who will use the ablution area regularly. A basin that works for one adult may not provide the same comfort for children or older family members.
Select An Appropriate Installation Height
The basin height should allow users to wash without excessive bending or stretching. Consider the height of household members and the position of any dedicated foot-washing section.
For shared facilities, a design that accommodates different users may be more practical than a fixed arrangement intended for one height range.
Provide Enough Movement Space
Leave adequate clearance around the basin so users can change positions comfortably. This becomes particularly important when washing feet or using a separate lower section.
Avoid placing storage cabinets or decorative accessories where they obstruct movement.
Consider Support Features
Grab bars and stable handholds may improve accessibility for users who need additional support. Their position should allow comfortable use without interfering with the washing process.
For public or commercial facilities, review applicable accessibility standards before finalizing the layout.
7. Plan Ventilation And Moisture Control
Regular water exposure increases humidity in enclosed bathrooms. Without proper ventilation, moisture may remain on walls, ceilings, and nearby surfaces.
An exhaust fan or suitable ventilation window helps remove excess humidity. This also supports the long-term condition of bathroom finishes and surrounding cabinetry.
Consider moisture-resistant materials for shelves, cabinets, and wall finishes near the basin. Seal exposed joints properly and inspect them periodically for signs of deterioration.
8. Choose Materials That Suit The Installation Environment
The basin material affects how it performs under regular water exposure and cleaning. Select a product that matches the intended use and maintenance routine.
Common options include:
- Ceramic: Offers a smooth glazed surface and straightforward cleaning.
- Porcelain: Provides a dense structure and good resistance to moisture.
- Solid surface: Allows different basin shapes and customized dimensions, with a smooth surface that is easy to maintain.
- Natural stone: Provides distinctive patterns but may require sealing and specialized cleaning.
- Stainless steel: Offers practical cleaning and corrosion resistance when the appropriate grade is used.
When comparing customized solid surface fixtures, Kingkonree is one manufacturer worth reviewing for its bathroom product specifications and material options. Check the installation instructions and technical details before selecting a model.
9. Coordinate Plumbing Work With Bathroom Construction
Installation becomes easier when plumbing and building work follow a clear sequence. Making changes after the tiles, walls, and flooring are complete can increase both costs and project time.
A practical installation sequence includes:
- Measure the bathroom and confirm the basin dimensions.
- Mark the water supply and drainage positions.
- Prepare wall reinforcement or floor support according to the model.
- Complete the necessary plumbing connections.
- Install waterproofing and bathroom flooring.
- Secure the basin using the approved installation method.
- Connect the faucet and drainage assembly.
- Test the water supply, drainage, and surrounding seals.
A qualified plumber and installer should coordinate their work to confirm that the fixture and plumbing system match.
10. Test The Installation Before Regular Use
Do not start using the washing area immediately after fitting the basin without checking its connections.
Run water through the faucet and inspect the supply pipes, drain assembly, and joints for leaks. Allow water to flow for several minutes and check whether it drains without collecting inside the basin.
Also inspect the surrounding floor for unexpected splashing or water accumulation.
Check that:
- The faucet operates properly.
- The drain handles the water flow.
- No leaks appear around the connections.
- The basin remains stable during use.
- The surrounding floor drains correctly.
- Users have enough space to wash comfortably.
Address any issues before completing the installation.
Common Wudu Sink Installation Mistakes To Avoid
Small planning errors can create problems that are expensive to correct later. Pay attention to these common mistakes during installation:
- Measuring only the basin width: The installation also needs sufficient depth and front clearance.
- Ignoring wall strength: A wall-mounted model requires suitable structural support.
- Poor drain positioning: Incorrect outlet placement may require additional plumbing work.
- Forgetting foot-washing space: The design may become uncomfortable when users cannot position their feet properly.
- Using unsuitable flooring: Slippery surfaces increase the risk of falls.
- Blocking plumbing access: Concealed connections should remain accessible for future repairs.
- Skipping leak tests: Small leaks may damage surrounding materials when left unnoticed.
Reviewing these points with the installer before work begins helps avoid unnecessary complications.
Final Thoughts
A successful ablution installation depends on more than selecting an attractive basin. Water supply, drainage, wall or floor support, available clearance, and moisture protection all contribute to its long-term performance.
Measure the bathroom carefully, review the fixture specifications, and coordinate plumbing work before completing the surrounding finishes. Give particular attention to foot-washing space and floor safety when planning the layout.
With proper preparation and professional installation, a dedicated ablution area can remain comfortable, practical, and easy to maintain for everyday household use.