
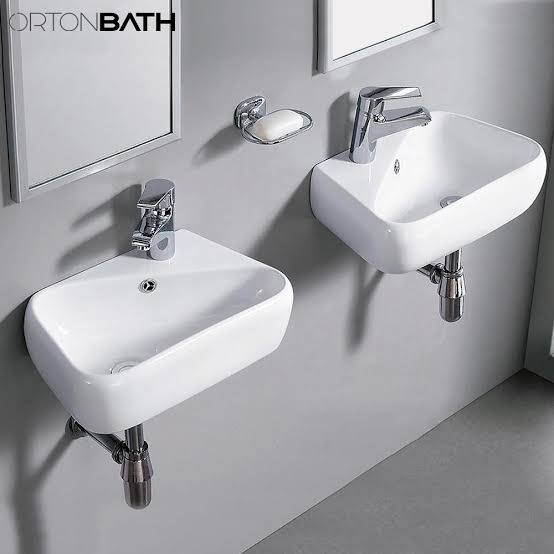

Installing a hand basin in a small toilet requires careful planning to make the most of the available space while ensuring reliable plumbing and comfortable everyday use. The right basin should fit the room, provide enough space for washing hands, and connect properly to the water supply and drainage system. Even a compact fixture can create installation challenges if its dimensions, mounting position, or pipe connections are not considered in advance.
When choosing Small Hand Basins for Toilets, it is important to evaluate more than appearance. Installation requirements, wall strength, tap placement, drainage access, and maintenance needs all influence the final result. Understanding these factors before purchasing can help homeowners, contractors, and renovators avoid unnecessary modifications and create a practical, well-organized toilet space.
Why Proper Installation Planning Matters
A small toilet room often has limited wall space and restricted access to existing plumbing. Installing a basin without measuring the area or checking the pipework can lead to awkward positioning, insufficient clearance, and expensive adjustments.
Good planning helps ensure that the basin is comfortable to use and that plumbing connections remain accessible for future maintenance.
Before installation, consider the following factors:
- Available wall or countertop space
- Basin width, depth, and height
- Existing hot and cold water supply lines, where applicable
- Drainage outlet position and pipe diameter
- Mounting method and structural support
- Tap configuration and splash protection
- Clearance around the toilet, door, and other fixtures
- Access to shut-off valves and plumbing connections
Reviewing these details before work begins makes it easier to select a compatible basin and determine whether changes to the existing plumbing are necessary.
1. Measure the Available Space Accurately
Accurate measurements are the foundation of a successful installation. A basin may appear compact in a product photograph but still project too far into a narrow toilet room.
Measure Width, Depth, and Height
Measure the wall or countertop where the basin will be installed. Record the available width and the maximum depth that will allow people to move comfortably around the toilet.
The basin’s height should support comfortable handwashing without creating unnecessary strain. Also consider the height and position of the tap, the bowl’s internal depth, and the location of the waste outlet.
Do not rely solely on the basin’s external dimensions. Check the manufacturer’s technical drawings to understand the overall projection, bowl dimensions, mounting points, and plumbing clearance.
Check Door and Fixture Clearance
Open and close the toilet room door to confirm that it will not strike the basin or its tap. Check the distance between the proposed basin position and the toilet, nearby walls, cabinets, and accessories.
Allow enough space to approach the basin and wash hands comfortably. Local building requirements may also specify minimum clearances, particularly in accessible or commercial washrooms.
Create a Layout Before Installation
Mark the basin’s outline and approximate mounting height on the wall or floor using removable tape. This simple step helps you visualize how the fixture will fit before drilling holes or changing pipework.
2. Choose the Right Mounting Style
The basin’s mounting method affects the installation process, plumbing arrangement, and use of available space.
Wall-Mounted Basins
Wall-mounted basins attach directly to a suitable wall or supporting structure. They leave the floor area beneath the basin open, which can make a compact toilet feel less crowded.
However, the wall must provide adequate support for the basin and the loads associated with everyday use. Depending on the wall construction and product design, reinforcement or a suitable mounting frame may be required.
Plumbing may be exposed beneath the basin or concealed within the wall. Concealed pipework creates a cleaner appearance but can make future repairs more complicated if access has not been planned properly.
Countertop Basins
Countertop basins sit on a vanity or worktop. The supporting surface must be strong enough to carry the fixture and withstand regular exposure to moisture.
The countertop opening, tap holes, and waste connection must match the manufacturer’s specifications. Sealing around the basin should also follow the installation instructions to help prevent water from entering the cabinet or damaging the surrounding surface.
Countertop designs can provide useful storage, but the vanity’s overall depth should not obstruct movement in a narrow room.
Corner Basins
Corner basins can use otherwise underutilized space. Their installation requires careful alignment with the adjoining walls and the existing supply and drainage routes.
Check that the tap remains accessible and that the bowl provides enough usable space for handwashing. The mounting surface and fixings must also be appropriate for the basin’s shape and weight.
3. Check Water Supply Requirements
The basin needs a reliable water supply that matches the tap or mixer being installed. Existing pipework may be suitable, but its location and condition should be checked before fitting the fixture.
Confirm the Supply Connections
Determine whether the basin will use a cold-water tap or a mixer connected to hot and cold supplies. The tap selected must be compatible with the basin’s tap-hole arrangement and the available plumbing.
Check the manufacturer’s specifications for connection sizes, recommended operating pressure, and any requirements for flexible hoses or isolation valves.
If hot water is required, confirm that the existing system can supply it safely and that the pipework is compatible with the installation.
Install Accessible Shut-Off Valves
Local isolation valves allow the water supply to be turned off when replacing a tap, repairing a connection, or servicing the basin.
Position the valves where they can be reached without dismantling fixed furniture or removing the basin. This is particularly useful in small toilet rooms where pipework may otherwise be hidden inside a narrow cabinet.
Inspect Pipes and Connections
Old, corroded, damaged, or poorly supported supply pipes should be assessed before the new basin is connected. Use fittings and connection components suitable for the pipe material and the intended water supply.
Connections should be tightened according to the manufacturer’s instructions. Excessive force can damage fittings, while insufficient tightening may cause leaks.
4. Plan the Drainage System Carefully
Correct drainage is essential for preventing standing water, slow emptying, and unpleasant odors. Before installation, compare the basin’s waste outlet position with the existing drainage connection.
Match the Waste Fitting to the Basin
Check the outlet diameter and the type of waste fitting specified for the basin. Some designs require a particular waste assembly or overflow-compatible fitting.
If the basin includes an overflow, confirm that the selected waste fitting supports it where required. If there is no overflow, use a compatible waste arrangement that suits the product design.
Position the Trap Correctly
A suitable trap helps prevent sewer gases from entering the toilet room. Its configuration must be compatible with the basin outlet and the existing drainage system.
Avoid improvised pipe arrangements that create poor drainage or make the trap difficult to clean. Ensure the trap and surrounding connections remain accessible for inspection and maintenance.
Maintain Appropriate Drainage Fall
Horizontal waste pipes generally need an appropriate downward fall toward the drain. The exact requirement depends on the applicable plumbing code, pipe diameter, and installation arrangement.
Incorrect pipe gradients can contribute to slow drainage or blockages. Where the existing outlet is poorly positioned, a qualified plumber should assess the best solution rather than forcing the connections into alignment.
5. Prepare the Wall or Countertop
The mounting surface must support the basin securely and remain suitable for a moisture-exposed environment.
For Wall-Mounted Installations
Identify the wall construction before selecting fixings. Solid masonry, timber framing, and lightweight partition walls require different mounting approaches.
Locate structural supports and use manufacturer-approved brackets, anchors, or reinforcement. Do not assume that a lightweight partition can carry a wall-mounted basin without additional support.
Before drilling, check for concealed electrical cables, water pipes, and other services. If their positions are uncertain, have them identified before making holes.
For Countertop Installations
Confirm that the worktop is level, stable, and appropriate for the basin’s weight. Cutouts must match the product’s dimensions and installation template.
Protect cut edges of moisture-sensitive materials with a suitable sealant or protective treatment as recommended by the worktop manufacturer. Apply sealing materials according to the basin instructions, taking care not to obstruct drainage openings or service access.
6. Follow a Logical Installation Sequence
Although the exact process varies by basin model, a planned installation generally follows these stages.
Step 1: Review the Product Instructions
Read the manufacturer’s installation guide and technical drawings before starting. Confirm the mounting hardware, tap configuration, waste assembly, and any special requirements.
Step 2: Shut Off the Water Supply
Close the appropriate isolation valves or the main supply when necessary. Open the existing tap to release residual pressure before disconnecting any pipework.
Step 3: Mark the Mounting Position
Use a level to mark the required height and mounting points. Double-check the basin’s projection and surrounding clearances before drilling.
Step 4: Install the Basin Support
Fit the specified brackets, frame, or countertop support. Ensure the mounting system is suitable for the wall or furniture construction and is securely fixed.
Step 5: Fit the Tap and Waste Assembly
Where the design allows, install the tap and waste components before placing the basin in its final position. Follow the manufacturer’s instructions for washers, seals, and fixing hardware.
Step 6: Secure the Basin
Position the basin carefully and fasten it using the specified fixings. Avoid overtightening, which may damage the fixture or its mounting points.
Step 7: Connect the Plumbing
Connect the supply lines and waste pipe using compatible fittings. Ensure the pipes are properly aligned and are not under unnecessary strain.
Step 8: Seal Where Required
Apply the recommended sealant at the specified joints, particularly where water could enter a wall or countertop interface. Follow the manufacturer’s guidance on sealant type and curing time.
Step 9: Test the Installation
Restore the water supply gradually and operate the tap. Inspect the supply connections, waste assembly, and trap for leaks. Fill the basin partially, release the water, and observe whether it drains smoothly.
Do not put the installation into regular service until any leaks or drainage issues have been resolved.
7. Common Plumbing Mistakes to Avoid
Several avoidable mistakes can reduce the performance of a newly installed basin.
Ignoring the technical drawings: Guessing dimensions can lead to misaligned mounting holes, incompatible fittings, or inadequate clearance.
Choosing the wrong tap: A tap that is too tall, too short, or incorrectly positioned can cause splashing and uncomfortable handwashing.
Using incompatible waste fittings: The outlet, waste assembly, and trap must be suitable for one another to ensure a reliable connection.
Forcing pipe connections into place: Misaligned pipes can place stress on joints and increase the risk of leaks. Correct the alignment instead of relying on excessive force.
Skipping leak tests: Even a small leak can damage cabinets, wall finishes, or flooring over time. Test both the water supply and the drainage system before finishing the installation.
Blocking service access: Concealing every connection without an access plan can make routine maintenance unnecessarily difficult.
Using unsuitable sealants: Sealants should be compatible with the basin material and surrounding surfaces. Follow the product instructions rather than applying a general-purpose product indiscriminately.
Avoiding these problems can reduce repair work and help protect the surrounding bathroom finishes.
8. Improve Space Efficiency Around the Basin
A successful installation should make the toilet room easier to use, not simply fit a fixture into the available area.
Keep the Area Around the Bowl Clear
Choose a basin projection that leaves adequate movement space. In a very narrow room, a wall-mounted or corner model may provide a better layout than a deeper countertop design.
Consider Tap Placement
Position the tap so that water flows into the usable part of the bowl rather than directly onto a shallow edge. A compatible tap and basin combination can help reduce splashing onto nearby walls and floors.
Plan for Accessories
Soap dispensers, towel rings, mirrors, and hand-drying arrangements should be positioned where they are convenient but do not interfere with the tap or basin.
Preserve Access for Maintenance
Keep shut-off valves, traps, and other service points accessible. A neat installation should still allow basic inspection and repairs without removing permanent finishes unnecessarily.
9. When to Hire a Professional Plumber
Some basin installations are straightforward, especially when replacing a fixture with a compatible model and retaining the existing pipework. Other projects require professional assessment.
Consider hiring a qualified plumber when:
- Water supply pipes need to be relocated.
- Drainage outlets require significant changes.
- The wall needs reinforcement for a heavy basin.
- Concealed plumbing has an unknown layout.
- Persistent leaks or drainage problems occur.
- Local regulations require work to be completed or inspected by an appropriately qualified professional.
A professional can also check whether the installation complies with relevant plumbing requirements and whether the proposed layout is practical for long-term use.
10. Final Inspection and Maintenance Tips
After installation, inspect the basin and surrounding area before considering the project complete.
Check that the basin is level and securely mounted. Run the tap at different flow rates, observe the drainage, and inspect all accessible connections for moisture. If the basin has an overflow, test it according to the manufacturer’s instructions.
During regular use, clean the surface with suitable products and inspect visible plumbing periodically. Look for loose fixings, damaged seals, unusual odors, and slow drainage. Addressing these signs early can help prevent larger problems.
Keep the product’s installation instructions and warranty information for future reference. If a replacement tap, waste fitting, or seal is needed later, the documentation can help identify compatible components.
Conclusion
Installing a small hand basin in a toilet room requires more than attaching a fixture to a wall or countertop. Accurate measurements, suitable mounting support, compatible water supply connections, effective drainage, and accessible service points are all essential to a reliable result.
Before purchasing, review the basin’s technical drawings and confirm that its dimensions and plumbing arrangement match the available space. During installation, follow the manufacturer’s instructions, use appropriate fittings, and test the system carefully for leaks and drainage problems.
With thoughtful planning and proper installation, a compact basin can provide convenient handwashing, make efficient use of limited space, and remain practical for everyday use. For installations involving structural changes or uncertain pipework, professional advice can help ensure a safe and durable outcome.